Are Book Nooks Hard to Build? Skill, Time & Tips
Are book nooks hard to build?
Book nooks aren’t inherently hard to build, but they can feel challenging if it’s your first time working with tiny parts, LED wiring, or detailed finishing. Most kits are designed for patient beginners: the steps are straightforward, yet the results depend on careful alignment, clean glue work, and taking your time. If you enjoy model kits, crafts, or puzzles, a book nook is usually more “time-intensive” than “technically difficult.”
What makes a book nook feel difficult?
The biggest difficulty is precision. Walls and floors need to be square so the scene slides neatly between books without bowing. Small decorative pieces can be fiddly, and tiny errors—like a slightly crooked partition—can cascade into doors that don’t sit flat or a roof panel that won’t close cleanly.
Lighting is another common hurdle. Many kits include LEDs and thin wires that must be routed discreetly. It’s not advanced electronics, but it does require gentle handling and testing the lights before sealing everything in place.
What skill level do most people need?
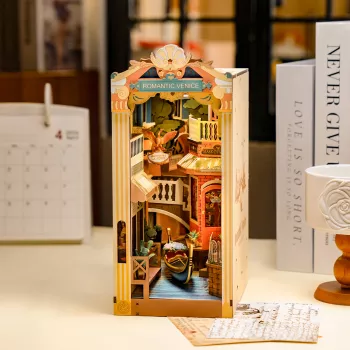
For a typical wooden book nook kit, basic craft skills are enough: following instructions, applying small amounts of glue, and using simple tools (tweezers, a craft knife, small clips). Painting and weathering are optional; they add realism but also add steps. If you want a build with a cozy, romantic look and clear guidance, follow the step-by-step approach in the Romantic Venice book nook DIY guide, which breaks down assembly and finishing choices in a practical way.
How to make building a book nook easier
Start by dry-fitting pieces before glue. Label parts as you punch them out, and sand tabs lightly if they’re tight. Use fast-grab wood glue sparingly—too much glue causes warping and visible residue. For lighting, test the circuit early and again before closing walls. Finally, work in short sessions; fatigue is when most misalignment happens.
How long does a book nook take to build?
Many people finish in a weekend, but detailed scenes can take several evenings. The time varies most with painting, added props, and how meticulous you are about seams and touch-ups. Going slowly usually produces a cleaner, sturdier insert.
FAQ
What tools do I need to build a book nook?
Most kits can be built with wood glue, tweezers, a craft knife, and small clamps or clothespins. A ruler and fine sandpaper help keep edges straight and improve the fit.


Leave a comment